 |
| Home |
Solex 4a1 carburetor re-bushing (primary side)
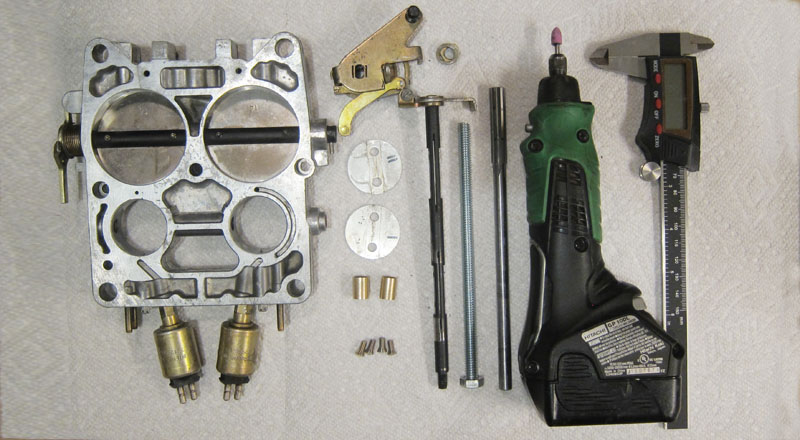
Machines wear down - this is a fact of life. When two metal parts touch, such as throttle shaft against carburetor body, they wears down unless a thin film of oil is provided. As gasoline is a strong dissolver, oil in that environment doesn't stand much chance so in no time you will end up with meta-against-metal friction. A machine that is 45 years old will show signs of age. Examining any old carburetor you should see the extremity of the throttle shaft wobble against the carb's body. Of the four Solex 4a1 carbs I have - ALL had some sort of throttle shaft play. Why, you might ask, is it important to fix the wobble with re-bushing? Two reasons. The wobble means that the shaft isn't rotating inside a around hole, rather in an oval. This might introduce extra air into the intake chamber - in essence creating a vacuum leak. Moreover, understand that carburetor at idle and off idle is a precision device with pinhole-sized openings for fuel. Any offset in that precise control of the throttle shaft will have negative impact on your car's idle as one side of the carburetor will takes in a different volume of air than the other side. The re-bushing isn't difficult but it isn't for the faint of heart either as you might ruin your base plate. Even though there are many places that can re-bush Quadrajet carburetor (very similar to Solex), they don't touch our carburetor or if they do, their prices are extravagant (a few hundred dollars and up). So your own rebushing might be the only answer. To re-bush your Solex 4a1 carburetor, you will need the following tools: Other tools: Procedure: 2. Grain down the stacked screws holding the throttle plates. Unscrew the screws and pull the plates out. If you don't, you might damaged the throttle shaft trying to unscrew the plate. Save those screws as you will re-use them later.
3. Pull out the pin holding the throttle level to the secondaries shaft.
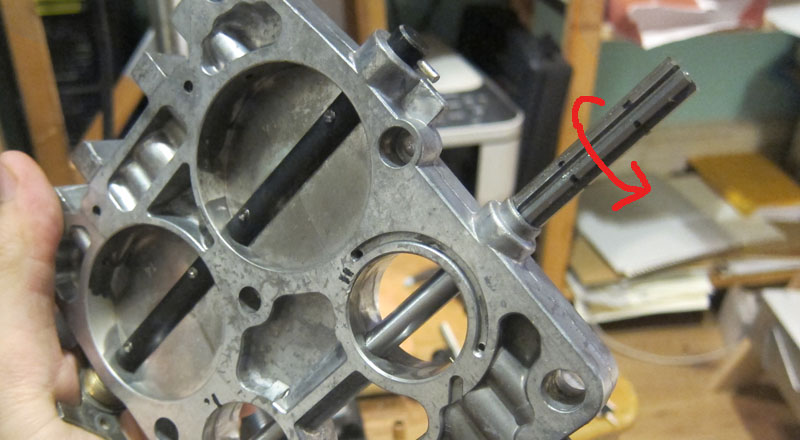
4. Unbolt the nut and using WD40 as lubricant on the shaft, pull out teh whole assembly of the primary throttle spring. You can pull the throttle shaft out.
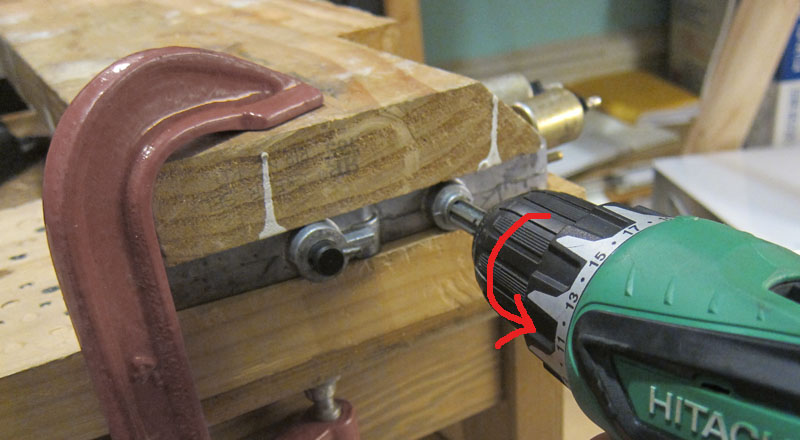
5. Using your new bronze bushings as guide, mark on the reamer how deep you will want to drill. You want to make sure NOT to drill into the throat chambers so the plates close fully.
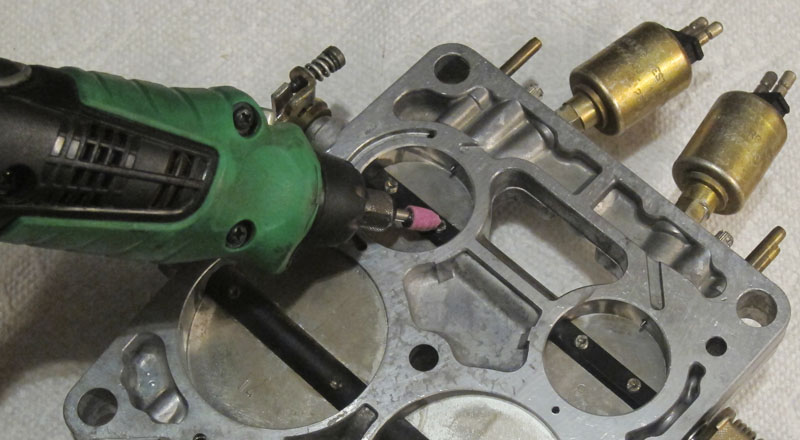
6. Mount the reamer part in drill's chuck so that the smooth part of the reamer will act as guide in the carburetor's base. Remember that in this configuration you need to set your drill to spin counter-clockwise to cut. With firm pressure cut out the placeholders for new bushings. Remember not to cut too deeply - stop on the mark!
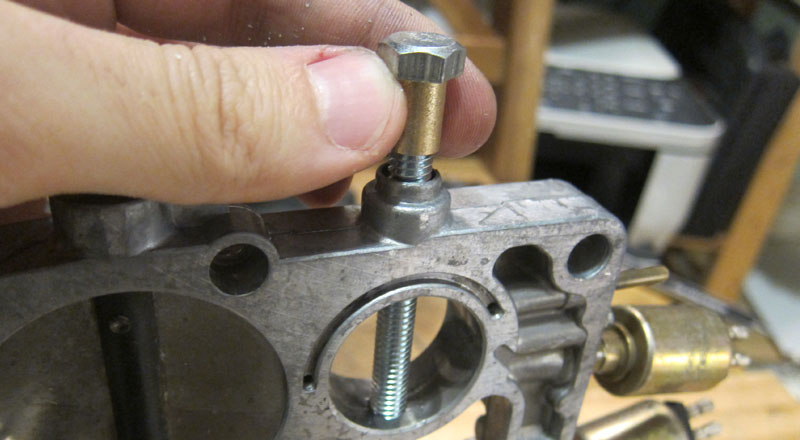
7. Put a small drop of red locktite (not in the picture) on the bronze bushings then insert the bushing around the 5/16 bolt. The long bolt will be used to guide the bushing so it sets in centered. Tap the bushing in and let the locktite cure overnight.
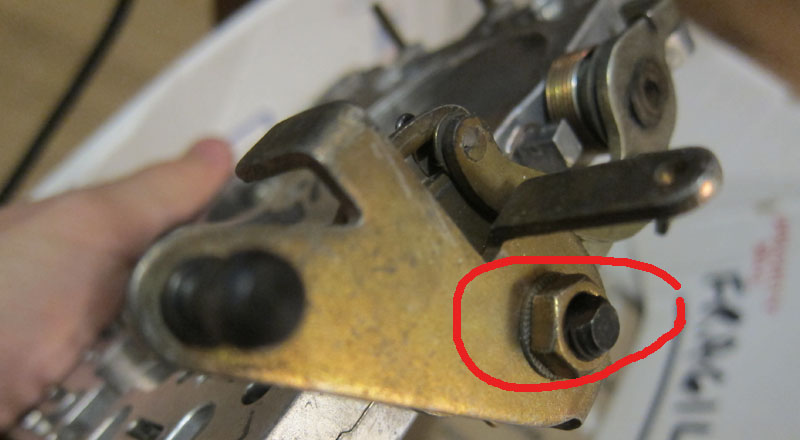
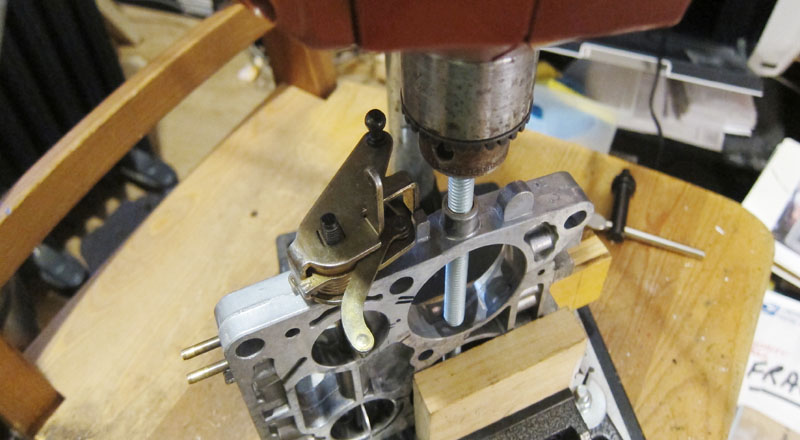
8. At this stage you have a bushing installed with 5/16 opening. The opening is around 7.80mm while your shaft is around 7.95. You will need to enlarge the opening with 8mm reamer to cut out extra material from inside of the bronze bushing. This part gets a bit complicated because the shaft of the 8mm reamer is too thin to use the alignmnet technique from point no 6. Instead, I used 6in long 5/16 bolt with its head cut off in my drill press to align the plate (pic below) then replaced the bolt with the 8mm reamer to enlarge the hole.
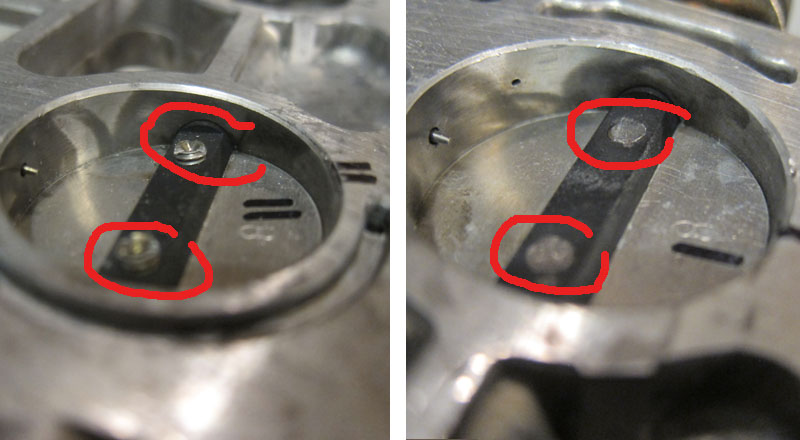
9. Insert the throttle shaft making sure it doesn't bind and moves freely. 10. Reinstall throttle plates and tighten (don't use locktite yet). Make sure everything is smooth and that throttle plates sit snugly agains the carb body. Slowly open the plates looking at the transfer holes. Are the holes exposed equally in both barrels? Only when you are happy with the results unscrew one screw at the time and use red locktite for final assembly. 11. Reinstall the throttle lever, washers and pin. Done!
|
| copyright 2019 by Patryk Rebisz |